In a world filled with digital communication and virtual experiences, there’s something delightfully tangible about stickers. They can be used to express your personality, promote a cause, or simply add a touch of creativity to everyday items. If you’re eager to explore the world of custom stickers, you’ve come to the right place. This article will walk you through the process of making customized stickers, turning your ideas into adhesive realities that stick around – pun intended!
Understanding Customized Stickers
Customized stickers are a unique way to showcase your passion for maritime themes, whether you’re a boating enthusiast, a beach lover, or someone who simply appreciates the symbolism of anchors. These stickers typically feature designs and can be personalized with your choice of colors, sizes, and text. Whether you want to adorn your watercraft, personalize your laptop, or use them as party favors, customized stickers offer a versatile and visually appealing option.
Materials You’ll Need
Before diving into the creative process, gather the necessary materials:
- Design Ideas: Start by brainstorming your anchor-related design. Consider variations such as nautical ropes, waves, or accompanying texts.
- Digital Design Software: Programs like Adobe Illustrator, Canva, or Inkscape can help you create and customize your sticker design.
- Sticker Paper: High-quality sticker paper suitable for your printer (inkjet or laser).
- Printer: An inkjet or laser printer with color printing capabilities.
- Cutting Tools: Scissors, craft knives, or a cutting machine like a Cricut or Silhouette.
- Clear Adhesive Film (Optional): A transparent adhesive film to protect your stickers and give them a professional finish.
- Laminator (Optional): If you want added durability, a laminator can help protect your stickers from wear and tear.
Step-by-Step Guide
1. Design Creation
1.1. Sketch Your Design: Begin by sketching your design and any additional elements on paper. This helps you visualize the layout before moving to digital design software.
1.2. Digital Design: Transfer your sketch to your chosen design software. Create vector images for sharp, resizable designs.
1.3. Color Selection: Choose colors that resonate with your theme. Nautical blues, sandy beiges, and deep ocean greens often work well.
1.4. Add Text (If Desired): Incorporate text that complements your design. This could be a motto, a personal message, or the name of your boat or project.
2. Printing
2.1. Paper Selection: Load your printer with the appropriate sticker paper. Ensure it’s compatible with your printer type to achieve the best results.
2.2. Printing Test: Print a test page on regular paper to ensure colors and design appear as intended.
2.3. Final Printing: Print your design onto the sticker paper. Allow the ink to dry completely before proceeding.
3. Cutting
3.1. Manual Cutting: If you’re using scissors or a craft knife, carefully cut out each sticker, following the design’s outline.
3.2. Cutting Machine: If you’re using a cutting machine, upload your design, adjust the settings, and let the machine do the work.
4. Finishing Touches
4.1. Optional Lamination: For added durability, laminate your stickers using a laminating machine or adhesive film.
4.2. Trimming (If Needed): Trim any excess laminate or sticker paper that extends beyond the design.
5. Application
5.1. Clean Surface: Before applying the sticker, clean the surface where you plan to stick it to ensure proper adhesion.
5.2. Peel and Stick: Carefully peel off the backing of the sticker and place it on the desired surface. Press down firmly to ensure it sticks.
5.3. Smooth Out Air Bubbles: Use a credit card or your fingers to gently smooth out any air bubbles under the sticker.
6. Showcasing Your Stickers
6.1. Photography: Capture high-quality images of your stickers to share on social media or online marketplaces.
6.2. Gifts and Events: Use your customized stickers as personalized gifts, party favors, or event giveaways.
Tips and Tricks
- Quality Matters: Invest in high-quality sticker paper and printing to ensure your stickers look professional.
- Precision Cutting: Take your time when cutting to ensure clean edges.
- Protective Measures: If you plan to use the stickers outdoors, consider using UV-resistant materials to prevent fading.
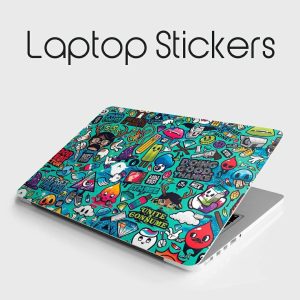
- Size Considerations: Choose sizes that fit well on common items like laptops, notebooks, and water bottles.
- Variety: Experiment with different designs, colors, and sizes to offer a diverse range of options.
Conclusion
Creating customized stickers is a rewarding endeavor that allows you to express your love for maritime themes in a unique and tangible way. With the right materials, a dash of creativity, and attention to detail, you can transform your design ideas into eye-catching stickers that leave a lasting impression. So, set sail on your sticker-making journey and watch as your personalized creations stick with people, both figuratively and literally!
